Automating Issues Generation with Issue Policy
In Blindata, strategies for automatic issue creation can be defined using issues policies when specific conditions are met.
How to manage Issue Policies
The policies are accessible within the platform through:
-
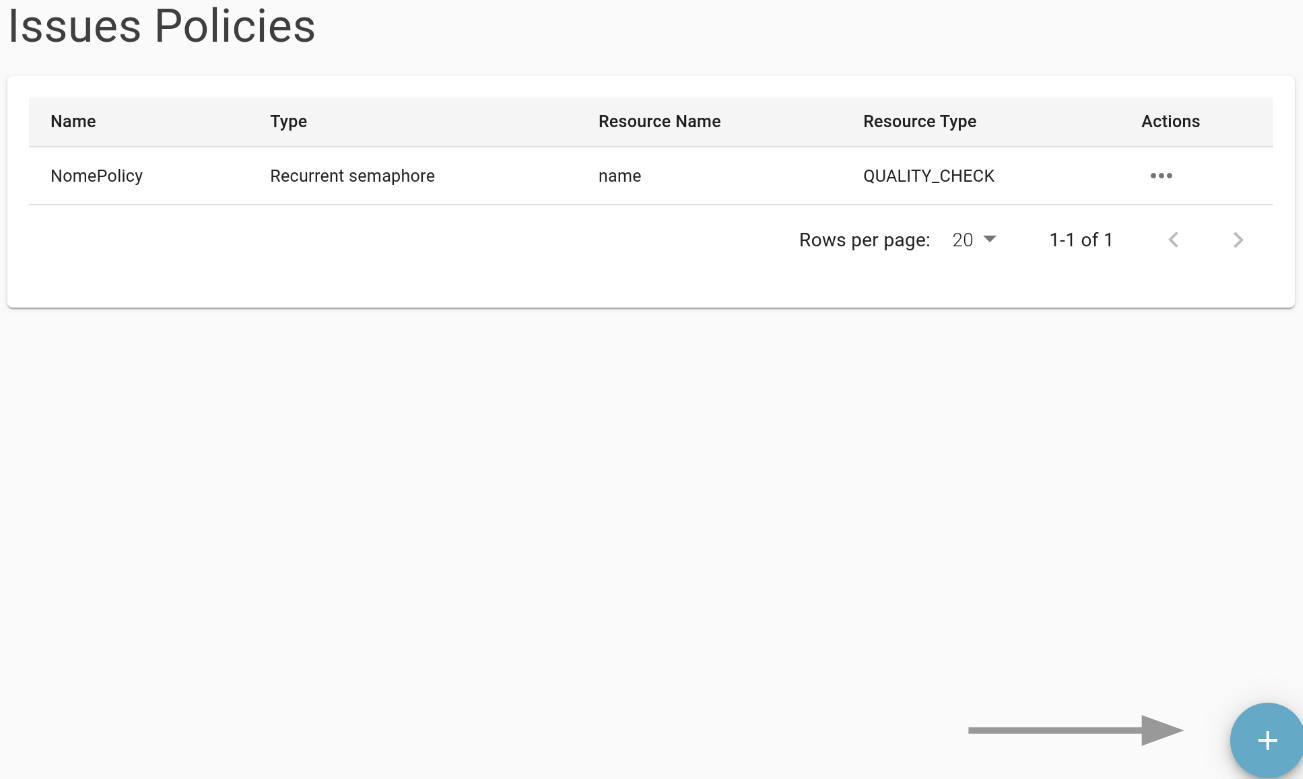
The issues list page, by accessing the list of policies with the button located on the right of the page title. This list presents details like policy name, type, and connected resource for each defined policy. With the action menu is possible to make modifications or cancel existing policies.
 The page also contains the button for creating new policies.
-
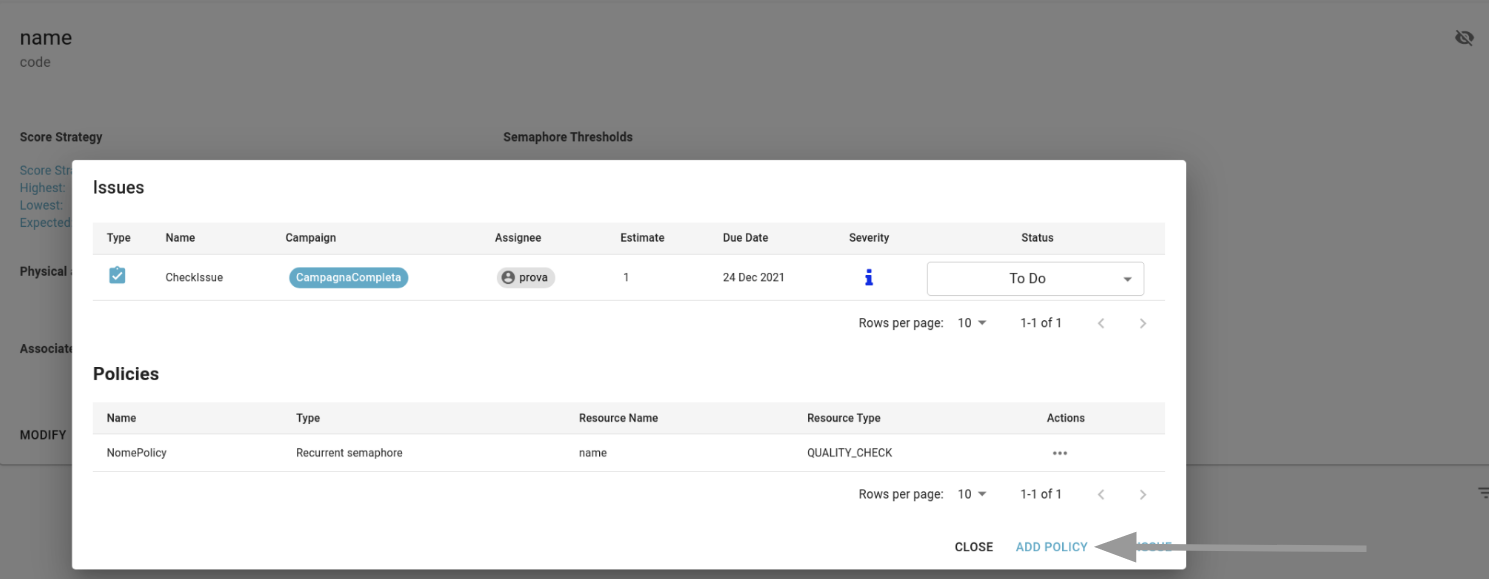
The issue management widget on the detail pages of the various resources. From this widget, it is possible to view related issues, create new issues, view associated issue policies, and create new policies.
Issue Policy creation and modification process
The creation and modification process consists of four steps:
-
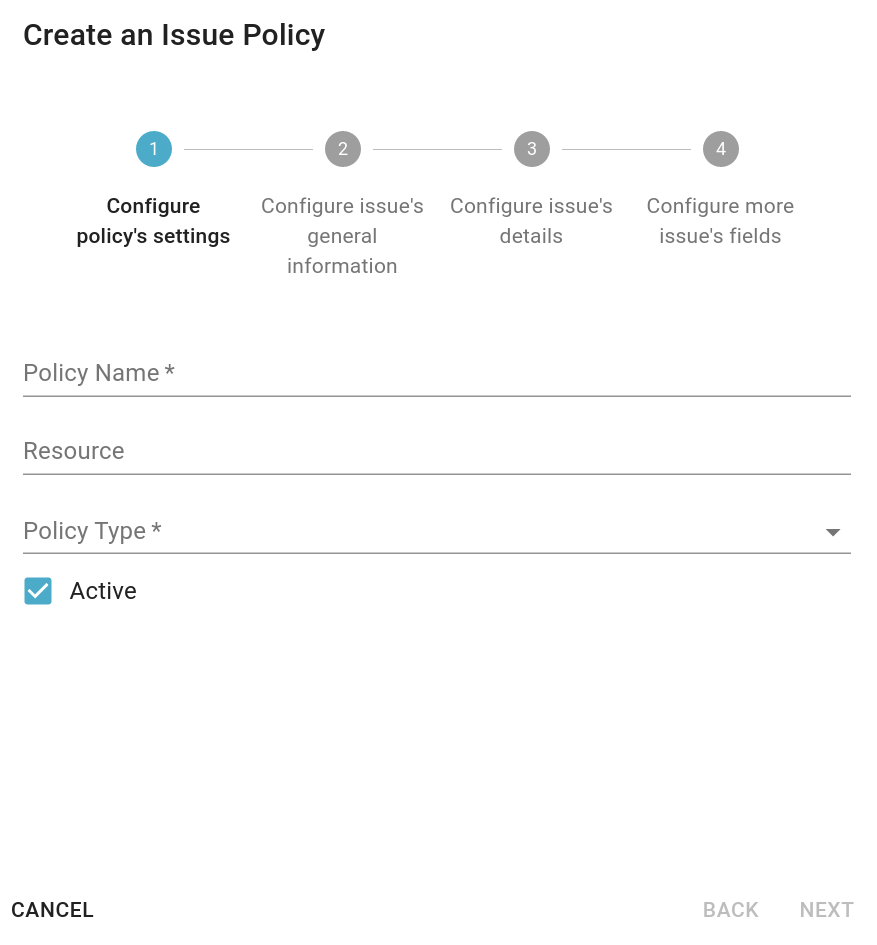
Define Policy Configurations :
- Policy Name (required): The name of the policy.
- Resource: the resource to which you want to associate the policy; the association to a resource is mandatory for those types of policies that are activated by events on the resources (see next paragraph).
- Policy Type (required): The type of the policy.
- Flag “Active”: indicates whether the policy is active or not; inactive policies do not trigger the creation of any issue.
-
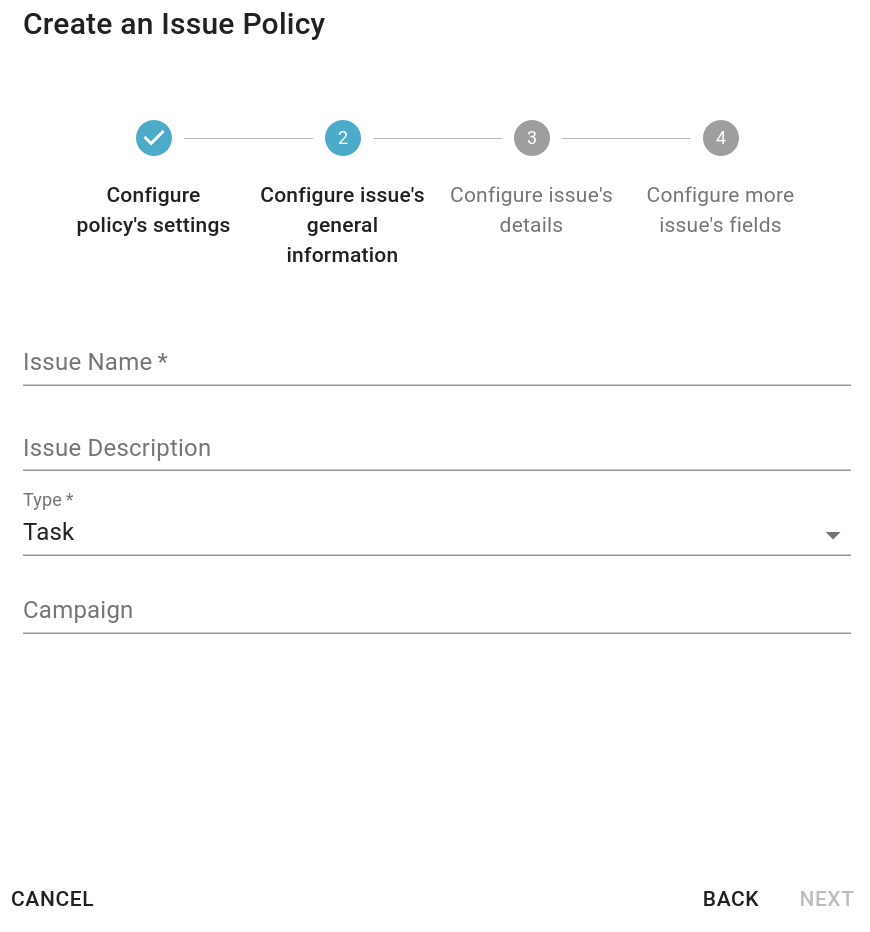
Define General Issue Info
The second step involves entering the general information of the issue to be created.
- Issue Name (required).
- Issue description.
- Issue type (required).
- Issue campaign.
-
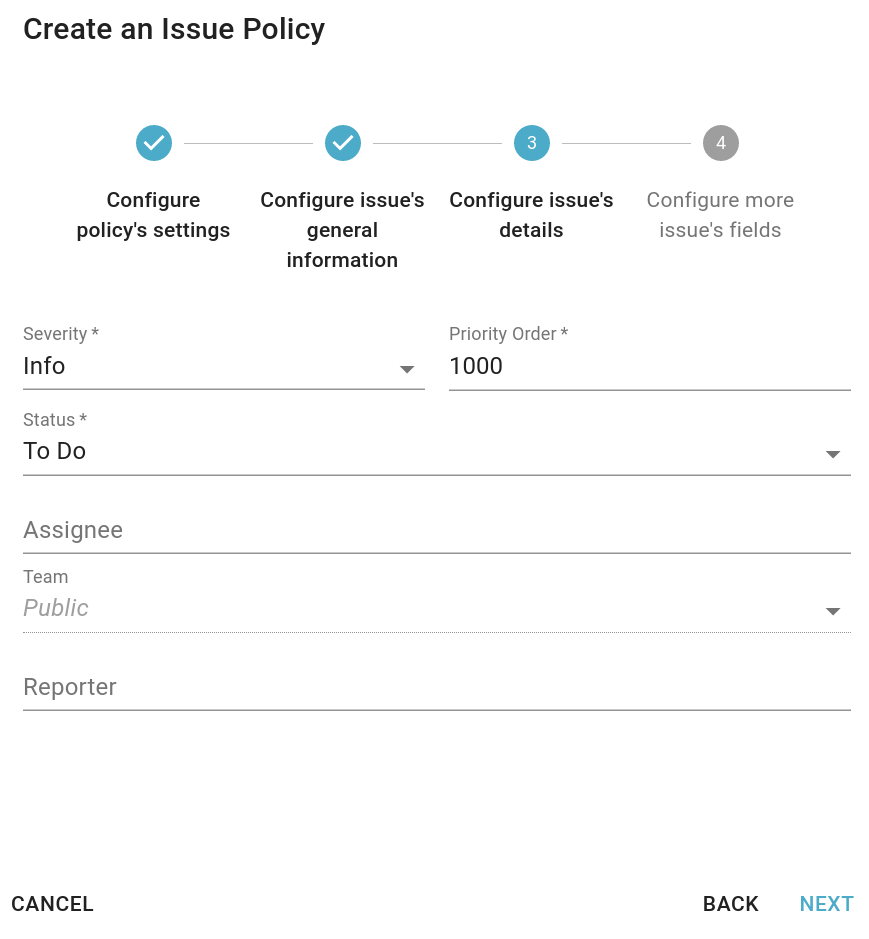
Define Issue Details
The third step allows the definition of the details of the issue. Mandatory fields include severity, priority order, status, and user details (assignee, team assignee, and reporter).
If you want to create issues assigned to a team, pay attention to configuring the appropriate reading permissions on the team as described in the previous paragraphs.
-
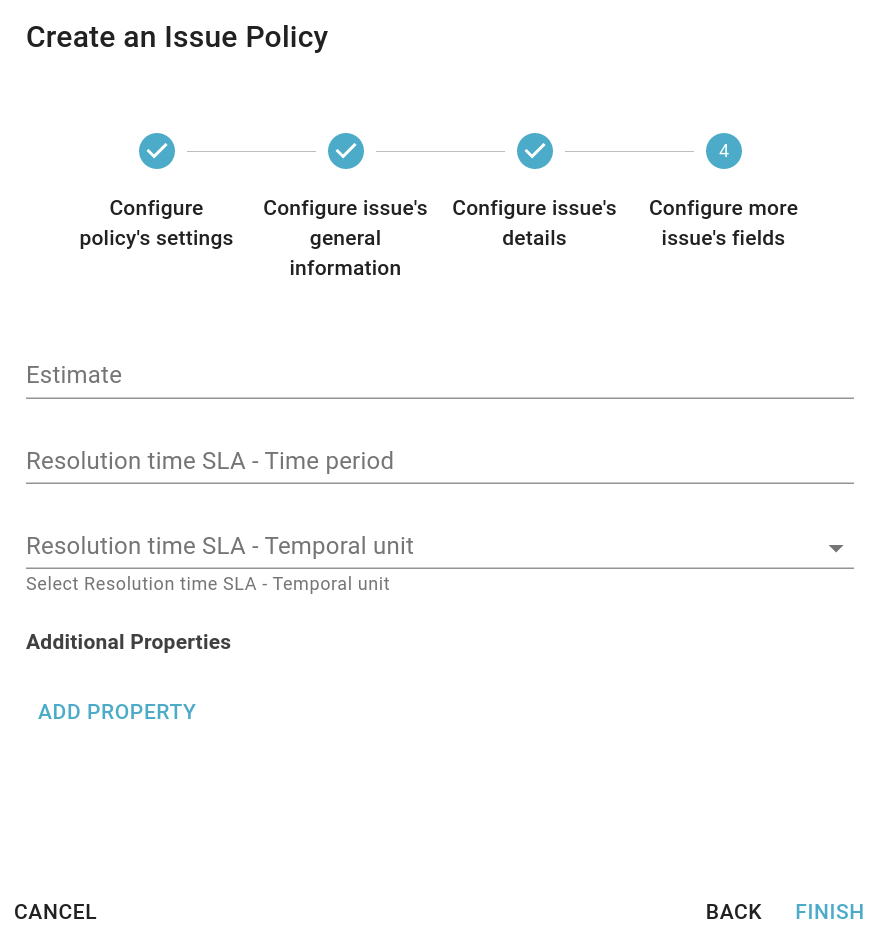
Define Additional Fields
The last step allows you to configure additional information such as the estimated resolution time for the issue (estimate field), the SLA (in terms of time period - an integer value - and temporal unit - hours, days, etc.) from which the due date for the issue will be calculated, as well as any custom and additional properties.
Types of Issue Policies
The platform provides several types of policies. Below are the available ones and how they should be configured.
Single Semaphore
 It can only be used in association with “Quality Check” type resources. It allows you to create an issue for each new result associated with the selected check which generates a traffic light of the selected color.
Recurrent Semaphore
It can only be used in association with “Quality Check” type resources. Like the previous type, this too is based on the results associated with the selected check; in this case the semaphores generated by the last N results collected are evaluated. The number of results to be consider and the color of the traffic lights are established by the user, as shown in the figure
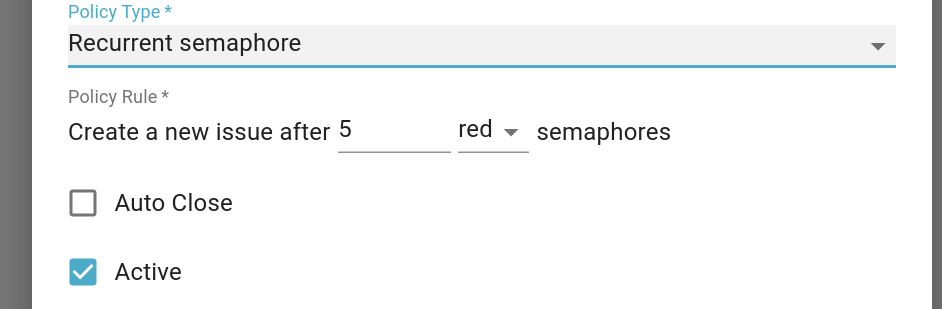 In the example shown, the issue will be generated after 5 red lights.
The “Autoclose” flag allows enabling automatic resolution of issues generated by the policy in case a result is detected with a semaphore different from the one selected by the user. Taking the previous example and assuming that an issue generated by the policy is still open, when a result with a yellow or green traffic light is collected, the issue is automatically placed in the “Done” state.
In case we have incidents that appear recurrently, multiple issues will be created on the same check. it is best to bring a possible real-life example summarized as follows:
In the example shown, the issue will be generated after 5 red lights.
The “Autoclose” flag allows enabling automatic resolution of issues generated by the policy in case a result is detected with a semaphore different from the one selected by the user. Taking the previous example and assuming that an issue generated by the policy is still open, when a result with a yellow or green traffic light is collected, the issue is automatically placed in the “Done” state.
In case we have incidents that appear recurrently, multiple issues will be created on the same check. it is best to bring a possible real-life example summarized as follows:
- A user creates a “recurrent semaphore” policy that creates an issue when N red semaphores arrive.
- N results associated with a red semaphore are received and the issue is correctly created.
- A result with a green semaphore is received.
- After that one, other N results with a red semaphore are created. That means that the error is occurring again as a different incident and therefore a new issue is created.
Scheduled
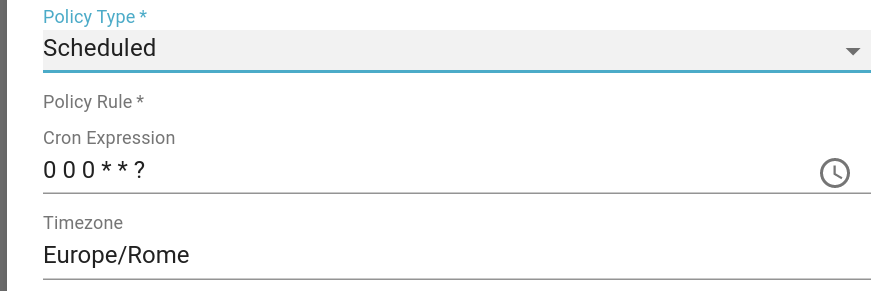 This type of policy can be associated with any resource in Blindata or no specific resource. Allows creating issues periodically, according to a cron expression defined by the user.