Agent Installation
Prerequisites
Software
The only prerequisite to use Blindata is to have Java installed on your machine (Amazon Corretto 21 suggested).
Database
Blindata supports PostgreSQL from version 15. By default Blindata agent can use an internal db on file (not intended for production usage).
Supported Browser
| Browser | Check Icon |
|---|---|
| Chrome | |
| Firefox | |
| Safari | |
| Edge | |
| Opera | Not Tested |
Hardware Requirements
Below are some possible scenarios for Blindata installation. Minimum requirements are provided for each scenario (enough for a small user group).
For the installation of only the Blindata Agent, the following minimum hardware requirements are suggested for the machine:
| CPU | RAM | DISK | OS/ SOFTWARE |
|---|---|---|---|
| 1 vCPU | 4 GB | at least 100GB (The amount of disk space will depend on the amount of data to be managed) | Debian 13 + Java 21 |
Installation Procedure
Note
The following installation procedure refers to a setup on OS Debian 13. The database setup is the default file-based one.
Step 1: Folder Structure
A description of the files contained in the installation zip follows.
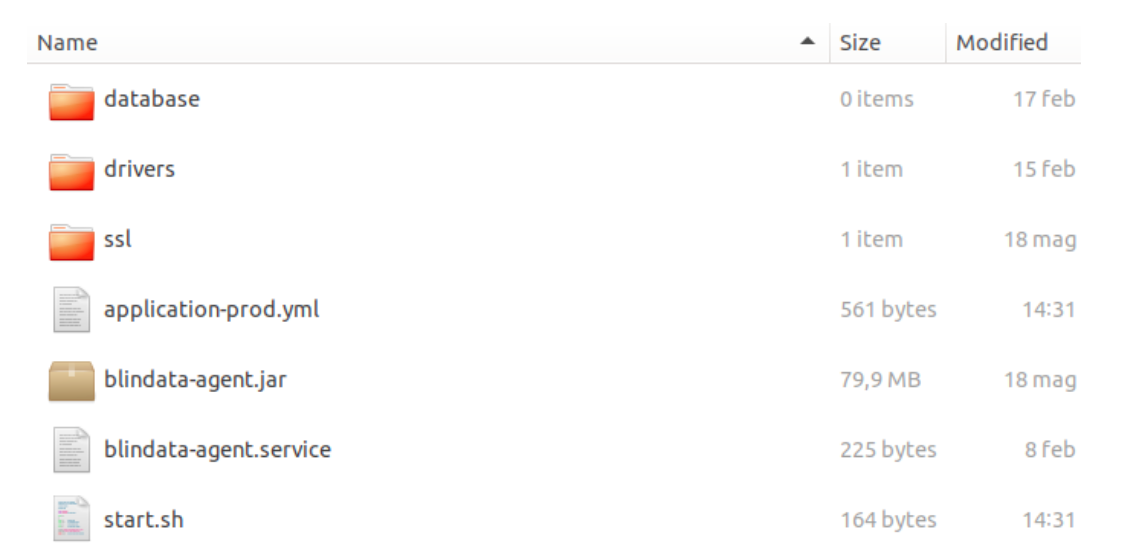 The content must be placed in the /var/blindata_agent folder:
➤ database: folder with agent’s data.
➤ drivers: folder with possible additional jdbc driver.
➤ ssl: ssl certificates folder (optional if there’s a reverse proxy in https)
➤ blindata.p12: ssl certificate.
➤ application-prod.yml: Blindata Agent’s configuration file.
➤ blindata-agent.jar: Blindata Agent’s bytecode java file.
➤ blindata-agent.service: systemd definition for starting the process as a service.
➤ start.sh: start script of the service.
The following commands are intended to be executed as root user.
Step 2: Prerequisite installation
Application system user creation
useradd -m "blindata"
Java 21 Installation (Amazon Corretto)
# Add Amazon Corretto GPG key and repository
wget -O - https://apt.corretto.aws/corretto.key | gpg --dearmor -o /usr/share/keyrings/corretto-keyring.gpg
echo "deb [signed-by=/usr/share/keyrings/corretto-keyring.gpg] https://apt.corretto.aws stable main" | tee /etc/apt/sources.list.d/corretto.list

# Update package lists and install Amazon Corretto 21
apt-get update
apt-get -y install java-21-amazon-corretto-jdk
Step 3: Copy of Folders
Create /var/blindata-agent and copy
cp -r blindata-agent/ /var/blindata-agent
chown -R blindata:blindata /var/blindata-agent
Step 4: Application Properties Configuration
Generate self signed certificate for the exposure of the APIs in https.
Generation of a keystore in PKCS12
cd /var/blindata-agent/ssl
keytool -genkeypair -alias blindata -keyalg RSA -keysize 2048 -storetype PKCS12 -keystore blindata.p12 -validity 3650
Move blindata.p12 file to the /var/ blindata-agent/ssl folder
File content /var/blindata-agent/application-prod.yml
server:
  port: 8443
  ssl:
    enabled: true
    key-store-type: PKCS12
    key-store: file:ssl/blindata.p12
    key-store-password: "<?VeH=tF2f;.P$Xs"
    key-alias: blindata

spring:
  profile: prod
  datasource:
    url: jdbc:h2:file:./database/blindata_agent;DB_CLOSE_ON_EXIT=FALSE;MODE=PostgreSQL;AUTO_SERVER=TRUE;database_to_upper=false;
    username: h2
    password: h2

blindata:
  agent:
    remote:
      base-url: https://app.blindata.io
      allowed-origin: https://app.blindata.io
    encryption:
      secret: c3Za63czaba1Ga7ja7U763jzqc61G86j
    http-client:
      connect-timeout: 60000
      connection-request-timeout: 60000
      socket-timeout: 60000
The properties to configure are:
- server.port: API exposure port for agent configuration
- ssl: remove the block if you want to expose in http behind a reverse proxy
- ssl.key-store-password: enter the password used when creating the certificate
- blindata.agent.remote.base-url: enter the url of the Blindata instance to be connected to the agent, in the case of SaaS leave the default
- blindata.agent.remote.allowed-origin: enter the url of the Blindata instance to be connected to the agent, in the case of SaaS leave the default
- blindata.agent.encryption.secret: application’s encryption key for connection credentials
- blindata.agent.http-client.connect-timeout: HTTP client connection timeout in milliseconds (default: 60000ms). Time to establish a connection to the server.
- blindata.agent.http-client.connection-request-timeout: HTTP client connection request timeout in milliseconds (default: 60000ms).Time to request a connection from the connection pool.
- blindata.agent.http-client.socket-timeout: HTTP client socket timeout in milliseconds (default: 60000ms). Time between data packets during communication.
In this configuration the internal file-based database engine is used.
Step 5: Systemd Configuration
File blindata-agent.service
[Unit]
Description=blindata-agent
After=syslog.target

[Service]
User=blindata
ExecStart=/bin/bash /var/blindata-agent/start.sh
WorkingDirectory=/var/blindata-agent
SuccessExitStatus=143

[Install]
WantedBy=multi-user.target
Systemd configuration
cp /var/blindata-agent/blindata-agent.service /etc/systemd/system
systemctl enable blindata-agent
systemctl start blindata-agent
Step 6: Procedure Checks
The following commands are used to check that the installation was successful:
Check systemd service
systemctl status blindata-agent
Check application status
curl https://localhost:8443/management/health
Log visualization
journalctl -u blindata-agent -f
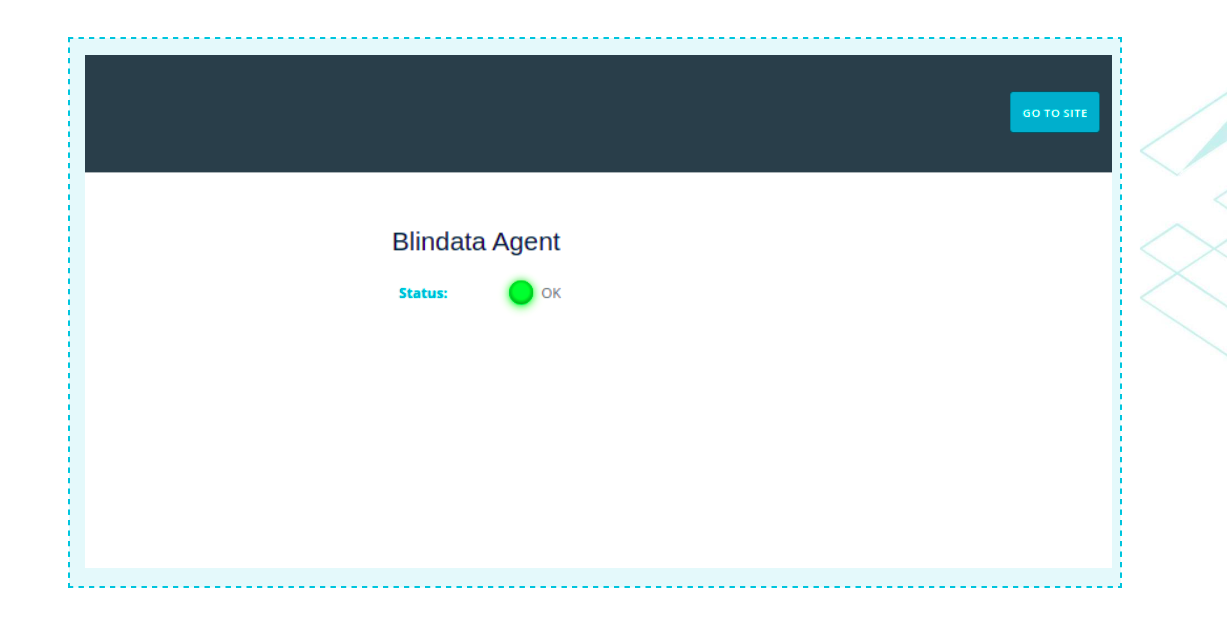
Check reachability from browser
https://<ip_address>:8443
If the installation has been successfully completed, you can check the status of the agent using the command shown above, as depicted in the figure.
Step 7: Connection to external database
To connect to an external Postgres db you can edit the following application properties in the file /var/blindata-agent/application-prod.yml
- spring.datasource.url: enter the jdbc url of the database on which you want to operate.
- spring.datasource.username: username to access the database.
- spring.datasource.password: password to access the database.
How to Locally Start Blindata Agent
Start the agent with the following command ,where the configuration properties must be properly compiled as described in the Installation Configurations section:
java
-Dloader.path=path/to/blindata-agent/lib/
-jar blindata-agent-<VERSION>.jar
--spring.datasource.url=jdbc:postgresql://<host>:<port>/postgres
--spring.datasource.username=postgresql
--spring.datasource.password=password
--blindata.agent.remote.base-url=https://blindata.mydomain.com
--blindata.agent.remote.allowed-origin=https://allowed-origin.mydomain.com
--blindata.agent.encryption.secret=<secret>
The option -Dloader.path must be specified only if the agent has to use custom drivers to connect itself to external systems. If there is no need to use custom drivers , the option can be omitted.
The properties set in the launch command can be alternatively configured in a file application.properties placed in the same folder as the jar file.
How to Pair Blindata Agent
Once installed Blindata Agent Blindata it is necessary to associate it to the tenant of Blindata with which you want to use it. This procedure is called pairing and it is used for:
- allow the agent to provision the report server database which will contain tenant data with which you are pairing
- allow the exchange of identifiers for the identification of the tenant
- test the reachability at network level; the agent must be able to invoke Blindata API in order to complete the tasks.
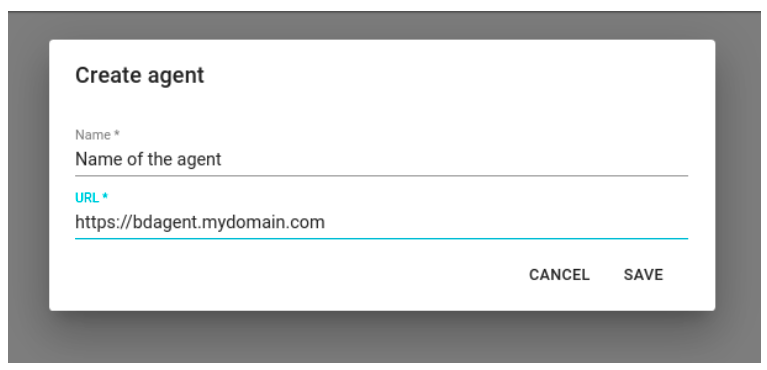
Within the section Settings > Agent you find the master of all the agents installed for a specific tenant. The first step of the procedure is that of the creation of an agent specifying:
- Agent’s name: this name will be used for agent recognition inside the platform
- Agent’s URL: URL through which the browser can interact with the agent
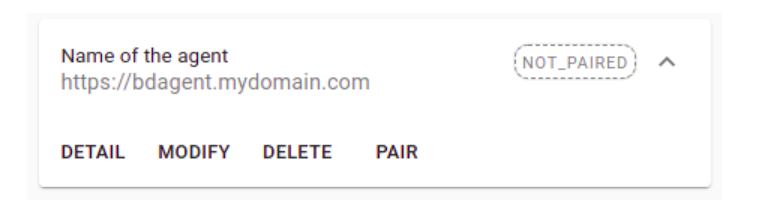
The pairing operation can be recalled in a subsequent step by pressing the button “PAIR”. At the end of operation the agent’s status will go from “NOT_PAIRED” to “PAIRED”.
If errors occur during the procedure you have to verify:
- That agent URL is correct
- That database credentials have permits to create schemas and tables
- That Blindata API are reachable from the setting on which agent is installed
Check the logs of both applications for more details.
Running Blindata Agent with Docker
Docker Environment Variable Configuration
When running Blindata Agent in a Docker environment, you can configure the application using environment variables.
Below is an example configuration using environment variables in your application.yml:
spring:
  profile: docker
  datasource:
    url: ${SPRING_DATASOURCE_URL}
    username: ${SPRING_DATASOURCE_USERNAME}
    password: ${SPRING_DATASOURCE_PASSWORD}

blindata:
  agent:
    remote:
      allowed-origin: ${BLINDATA_AGENT_REMOTE_ALLOWEDORIGIN}
      base-url: ${BLINDATA_AGENT_REMOTE_BASEURL}
    encryption:
      secret: ${BLINDATA_AGENT_ENCRYPTION_SECRET}
    http-client:
      connect-timeout: ${BLINDATA_AGENT_HTTP_CLIENT_CONNECT_TIMEOUT:60000}
      connection-request-timeout: ${BLINDATA_AGENT_HTTP_CLIENT_CONNECTION_REQUEST_TIMEOUT:60000}
      socket-timeout: ${BLINDATA_AGENT_HTTP_CLIENT_SOCKET_TIMEOUT:60000}
Environment Variables Explained:
SPRING_DATASOURCE_URL: JDBC URL for the database connection.SPRING_DATASOURCE_USERNAME: Database username.SPRING_DATASOURCE_PASSWORD: Database password.BLINDATA_AGENT_REMOTE_ALLOWEDORIGIN: Allowed origin for remote agent connections.BLINDATA_AGENT_REMOTE_BASEURL: Base URL for remote agent connections.BLINDATA_AGENT_ENCRYPTION_SECRET: Secret key for encryption.BLINDATA_AGENT_HTTP_CLIENT_CONNECT_TIMEOUT: HTTP client connection timeout (default: 60000ms).BLINDATA_AGENT_HTTP_CLIENT_CONNECTION_REQUEST_TIMEOUT: HTTP client connection request timeout (default: 60000ms).BLINDATA_AGENT_HTTP_CLIENT_SOCKET_TIMEOUT: HTTP client socket timeout (default: 60000ms).