Manage Connections
A connection for the agent defines how to reach an external system. On supported agents, a connection is a connection template: shared settings such as the URL, driver, and optional properties, together with a credential strategy that determines how authentication is handled.
Legacy connections still use the older single-form UI, where the username and password are stored directly on the connection itself.
All credentials are encrypted with AES 256-bit encryption and saved in the agent database. They are kept in clear memory only for the purpose of executing the relevant jobs. Once you have entered the credentials it is possible to modify them but they cannot be visualized.
Connection Setup
Definition and maintenance of the list of connections managed by the agent is accessible by navigating to Settings > Agents and selecting the Connections tab. Within the list you can view the details of a connection and access the edit and delete buttons.
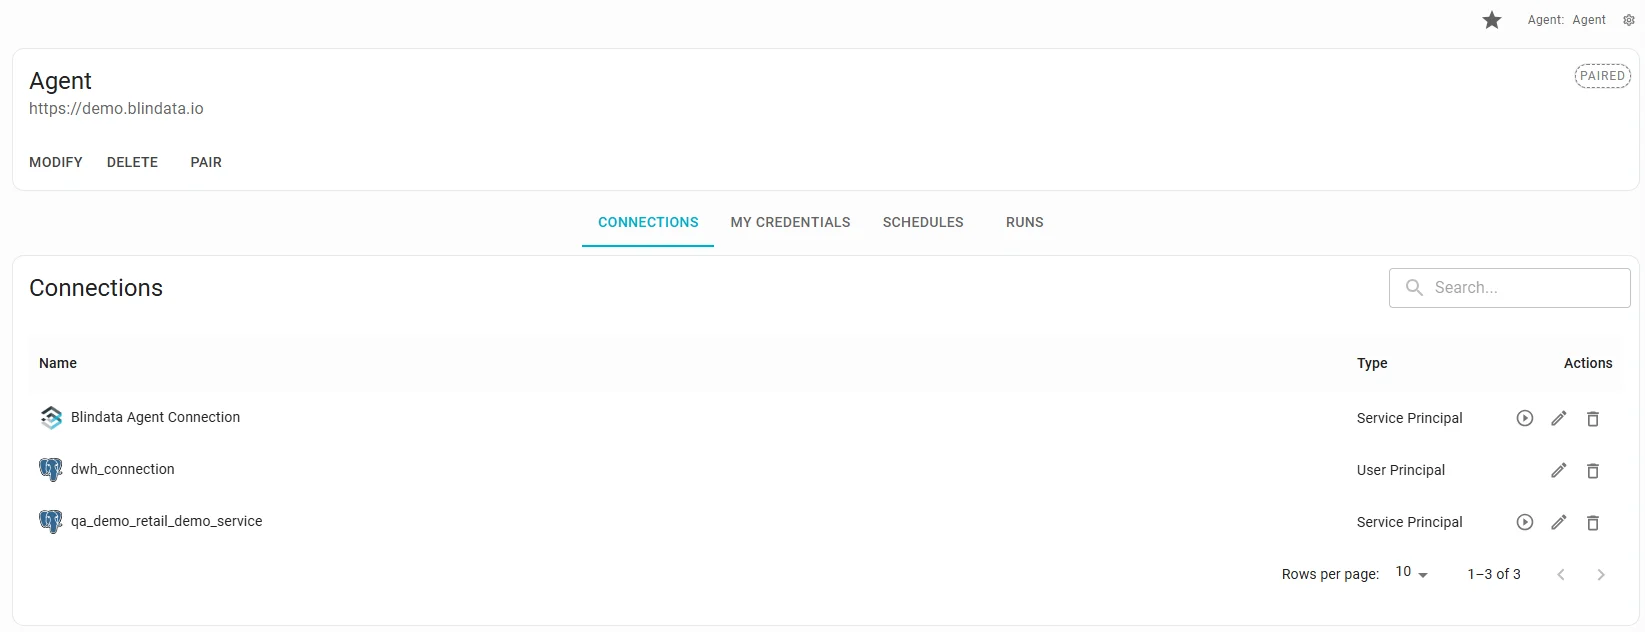
New connection wizard
For agents on on the latest version, new connections are created through a three-step connection wizard:
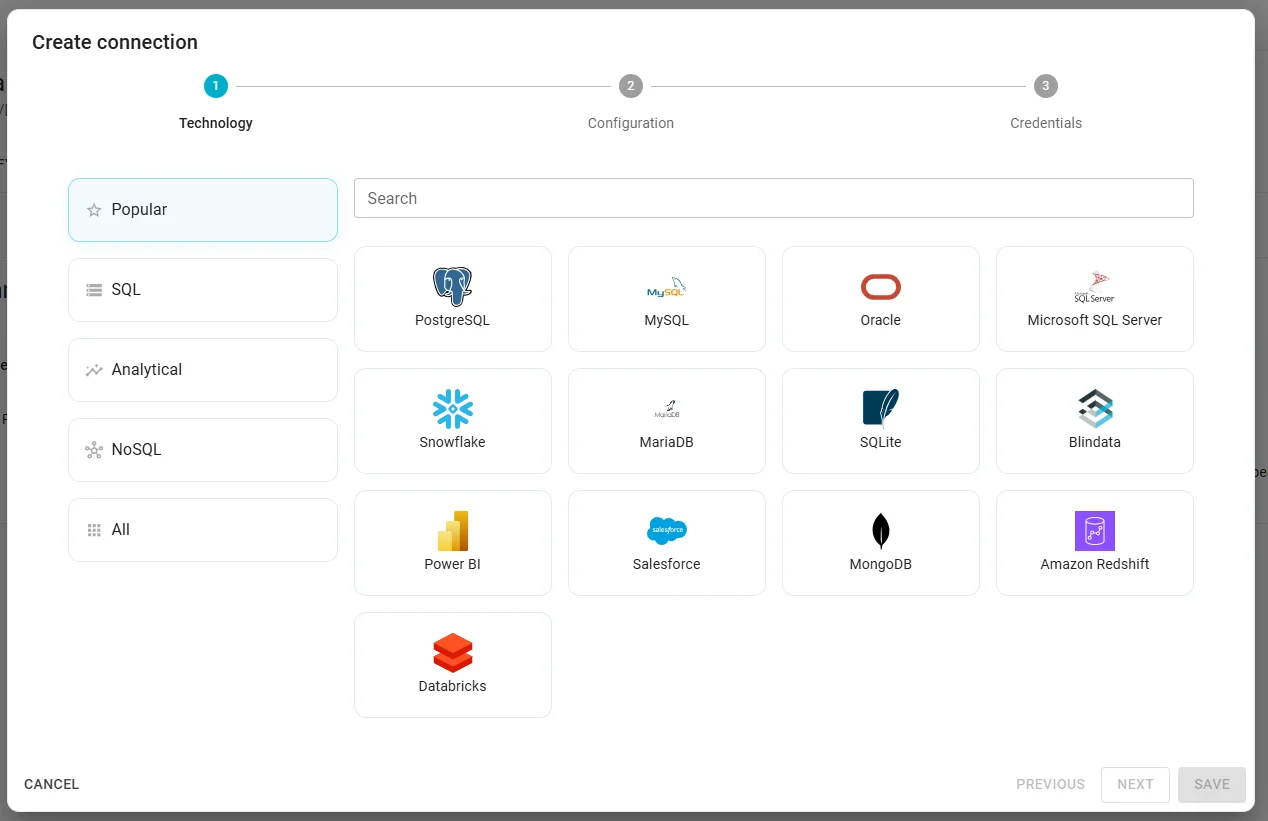
- Technology — select the target system type (for example PostgreSQL, MySQL, or Salesforce).
- Configuration — set the connection name, URL, driver properties, catalog links, and credential slots.
- Credentials — choose how credentials are stored and used at runtime.
Open the wizard from the Connections tab using the create (+) button.
If the agent runs an older version, or when editing an existing legacy connection, the older single-form connection modal is used instead.
Create a connection
The following sections walk through each step of the connection wizard.
Step 1 — Technology
Select a technology category (Popular, SQL, Analytical, NoSQL, and others).
Step 2 — Configuration
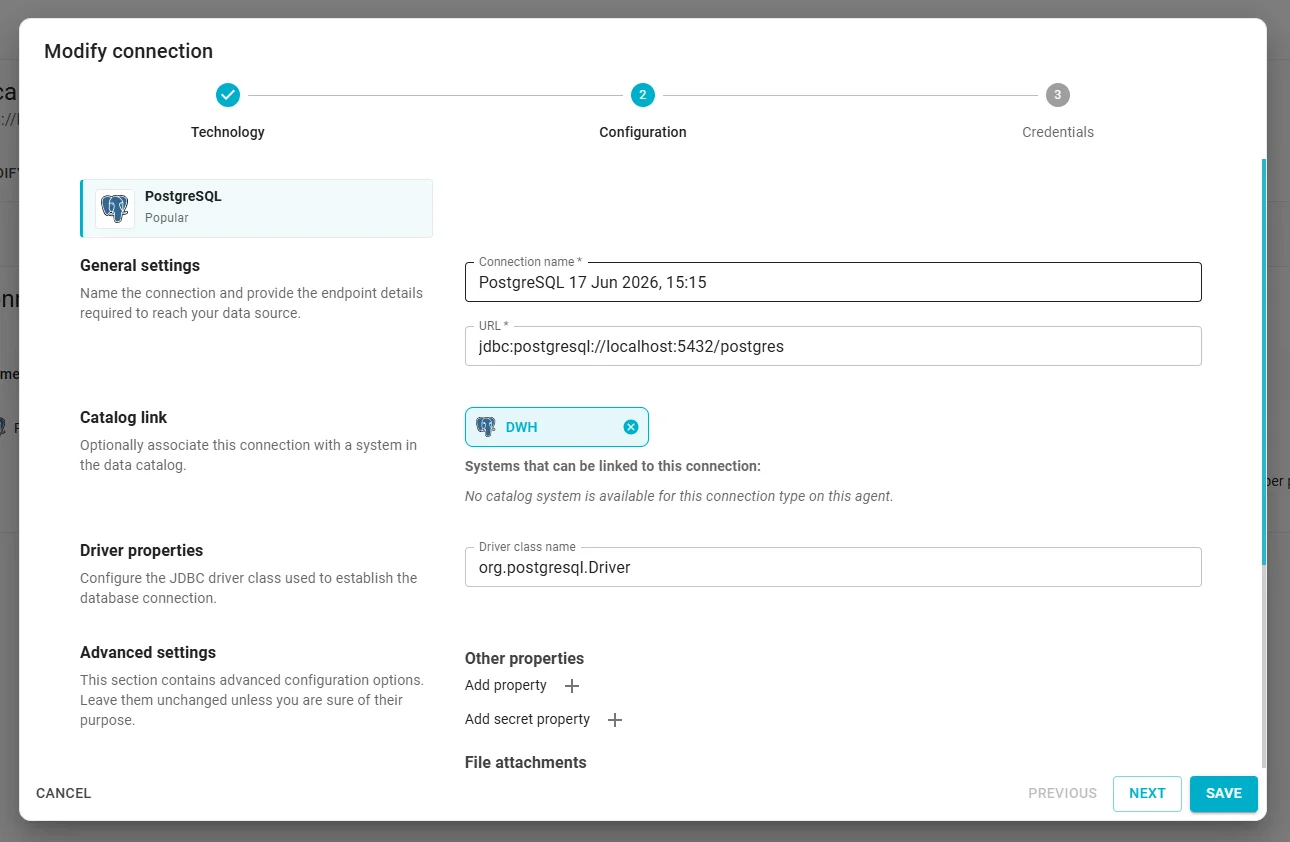
Configure the connection details required to reach the data source.
General settings
- Connection name: A descriptive label for the connection.
- URL / Endpoint: The connection string or endpoint required by the selected technology (for example
jdbc:postgresql://localhost:5432/postgres).
Catalog link
Optionally associate the connection with one or more systems registered in the Blindata data catalog. Only systems with a compatible technology are shown.
Driver and technology properties
Depending on the selected technology, additional fields may appear (for example JDBC driver class name).
Advanced settings
This section contains optional configuration that can be left unchanged unless you know it is required:
- Add property: Pass driver-specific settings such as timeouts, schema, or application name.
- Add secret property: Store sensitive values as encrypted properties.
- Add file attachment: Upload secret files such as SSL certificates, key stores, or JSON credentials.
- Credential slots: Define which credential keys users must provide later. For JDBC connections, the default slots are
user(username) andpwd(password). Each slot can be marked as Secret or File, and additional slots can be added as needed.
See Connection properties and file attachments for more detail on properties, secret properties, and file uploads.
Step 3 — Credentials
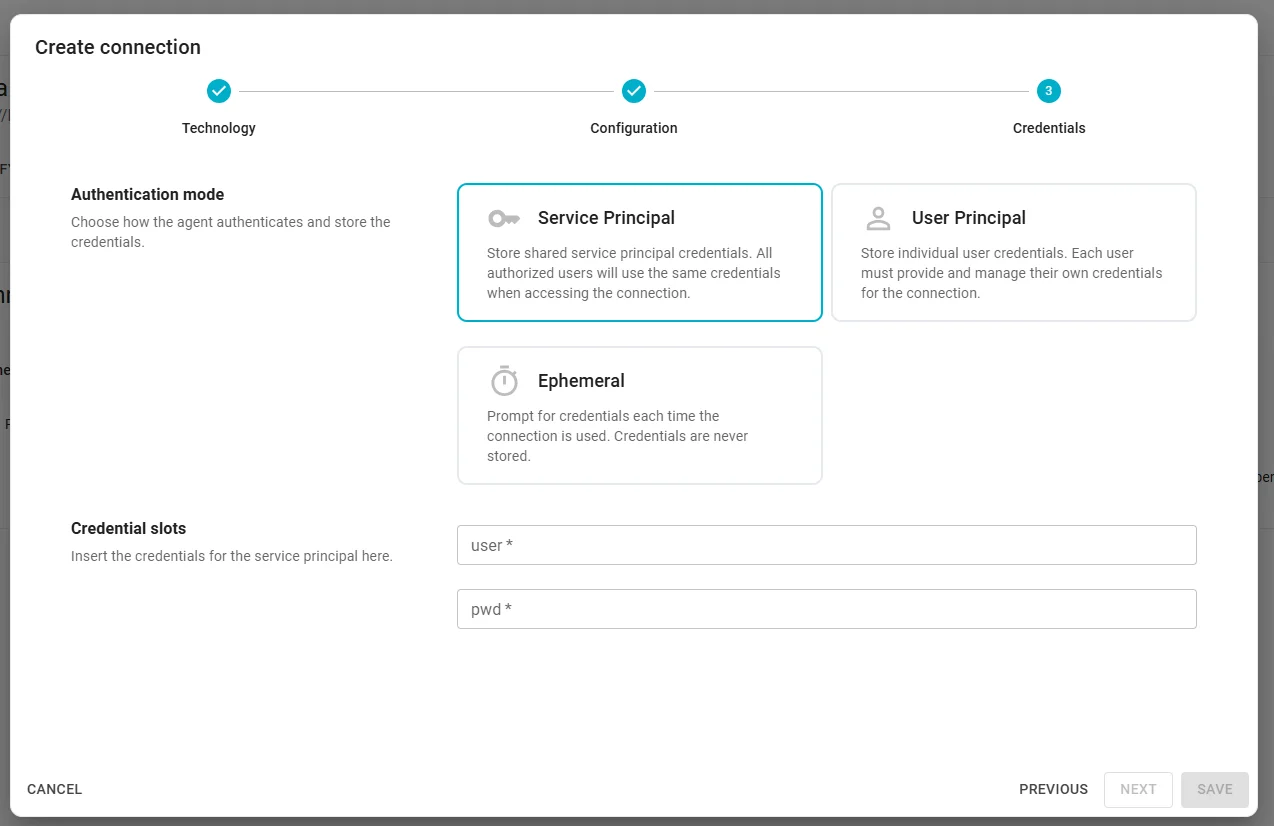
Choose how the agent authenticates when using this connection. Three authentication modes are available, depending on the selected technology:
| Mode | Description |
|---|---|
| Service Principal | Store shared credentials on the connection. All authorized users use the same credentials when accessing the connection. |
| User Principal | Store individual user credentials. Each user must provide and manage their own credentials for the connection. This is the mode used for BYOC (Bring Your Own Credentials). |
| Ephemeral | Prompt for credentials each time the connection is used. Credentials are never stored. |
For some technologies, Service Principal is the only supported authentication mode.
When Service Principal is selected, enter the shared credential values for each configured credential slot before saving.
When User Principal is selected, users will provide their own credentials from the agent connections page after the connection is saved. No credential values are required at this step.
When Ephemeral is selected, no credential values are required. They will be collected at runtime.
Bring Your Own Credentials (BYOC)
BYOC (Bring Your Own Credentials) lets administrators define how to connect to a system while each authorized user stores their own credential values. This is useful when every user must authenticate with their personal database account or service identity.
BYOC uses the User Principal authentication mode. It differs from:
- Service Principal, where one shared set of credentials is stored on the connection.
- Legacy connections, where username and password are stored inline on the connection itself.
Administrator setup
To configure a BYOC connection:
- Create a new connection using the connection wizard.
- On the Configuration step, verify or adjust the Credential slots. The default JDBC slots are
userandpwd; you can add custom slots or mark slots as Secret or File. - On the Credentials step, select User Principal.
- Save the connection. No end-user credential values are required at this stage.
End-user setup
After a BYOC connection has been saved, each user must provide their own credentials:
- Navigate to Settings > Agents and select the agent.
- Open the My credentials tab (next to the Connections tab).
- Locate the connection in the list. Use the status filters (All, Credentials set, Missing) or the technology filter to find connections that still need credentials.
- Click Set credentials (or Update to change existing values).
- Enter a value for each credential slot defined by the administrator (for example username and password).
- Save. The credentials are stored securely for your user only.
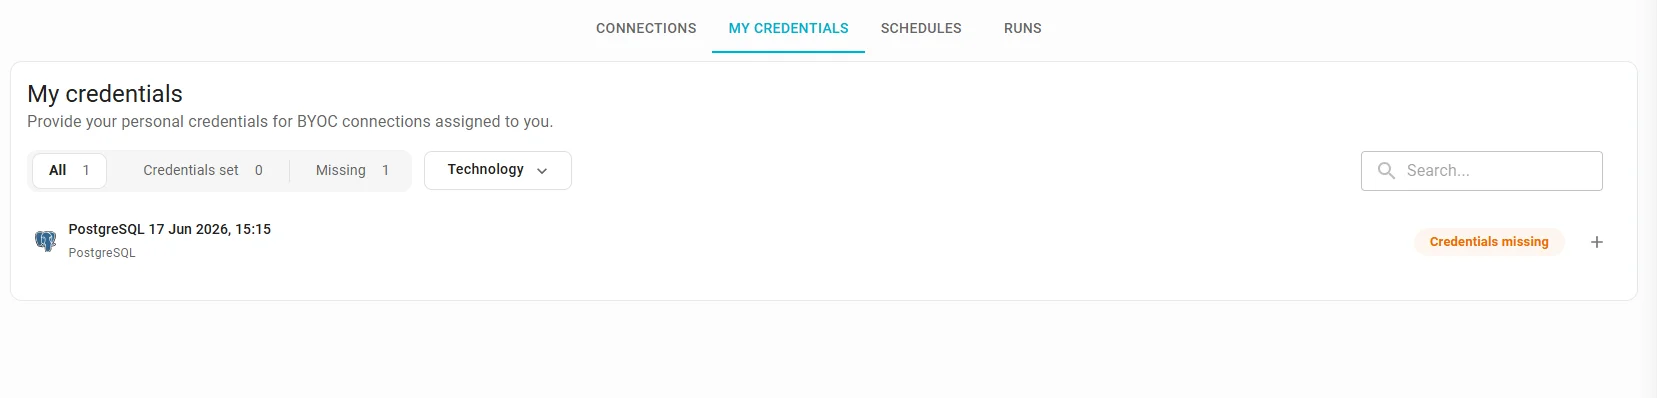
When jobs or interactive features use the connection, the agent automatically resolves and applies the stored credentials for the current user.
Operational notes
- Credential values are encrypted per user and cannot be viewed after they are saved; they can only be updated or removed.
- Once credentials are set, you can test the connection from the My credentials tab.
- If credentials are missing, the connection cannot be used until the user sets them.
- BYOC connections also power Chat with Your Data in the Blindata Assistant, allowing each user to run grounded queries against live systems with their own credentials.
How to Test Connections
Where you can test a connection depends on its authentication mode.
Service Principal connections
On the Connections tab, use the test action on a connection to verify that the agent can establish a connection with the shared credentials stored on the connection. This option is available only for connections that use Service Principal credentials (including legacy connections). User Principal connections do not show a test action here, because no shared credentials are stored on the connection itself.
User Principal connections
For BYOC connections, test the connection from the My credentials tab after you have saved your personal credentials. The test action appears once your credentials are set, and uses your stored values to verify connectivity.
In both cases, the test checks whether a connection can be established with the saved parameters. It cannot detect permission issues on the data structures.
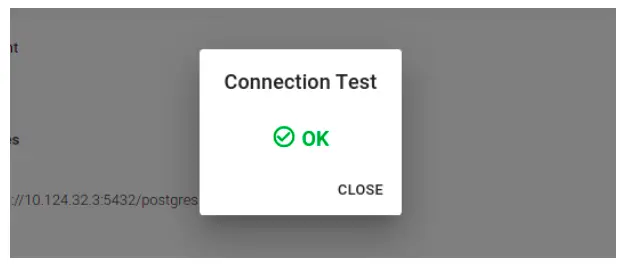
In case of a positive outcome you will see an “OK” message. The connection is properly configured and ready to use: the system can be reached and there are no networking issues.
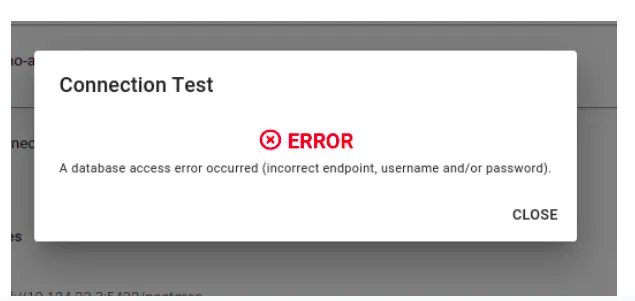
In case of failure the error message will be specific depending on the driver implementation in use. Depending on the type of error test reachability from a network perspective and/or re-enter the correct credentials.
Connections to Blindata
A particular type of connection managed by the agent is the “Blindata” connection. This type of connection is used to specify access credentials to be used in the results upload procedures. It can also be created through the connection wizard by selecting the Blindata technology.
These credentials must have the appropriate permissions depending on the type of tasks to be carried out.
Connection properties and file attachments
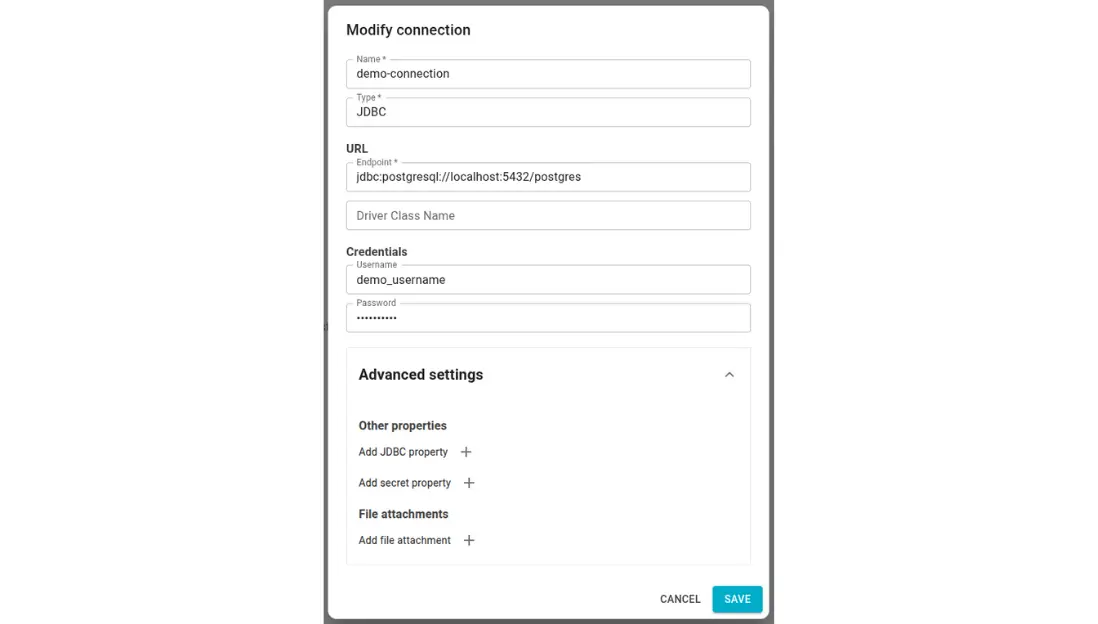
Both the connection wizard and the legacy connection form let you add optional properties and files to a connection. In the wizard, these options are available under Advanced settings on the Configuration step. In the legacy form, open the Advanced settings section.
How to add connection properties
- Add property: Pass driver-specific settings such as timeouts, schema, or application name.
- Add secret property: Store sensitive values as encrypted properties that should not be stored directly in the main form.
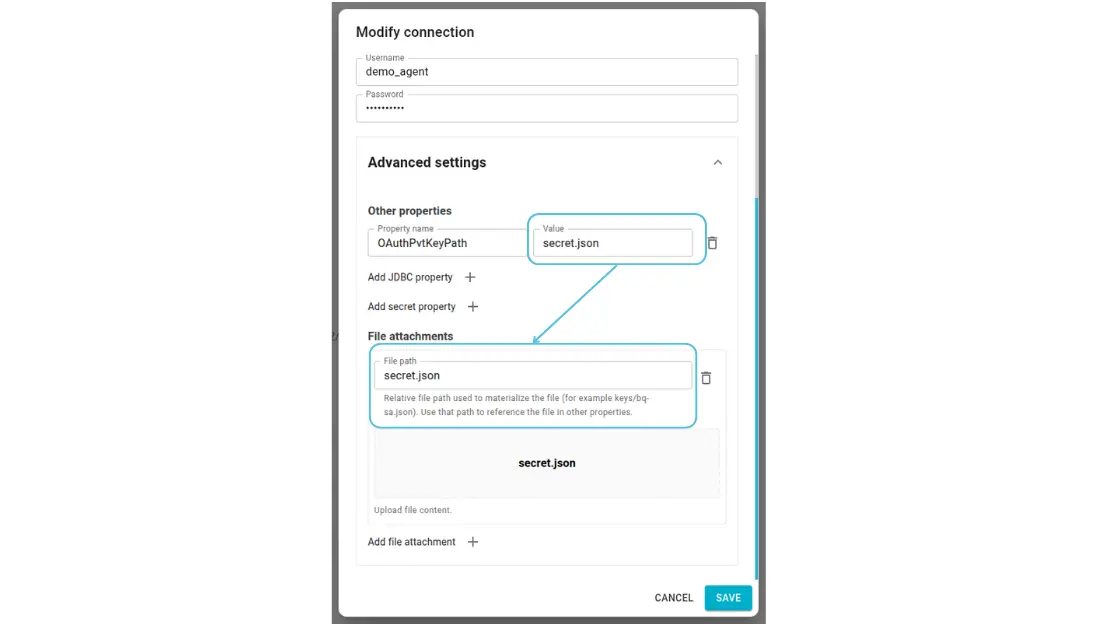
- Add file attachment: Upload secret files such as SSL certificates, key stores, or JSON credentials required by the driver.
How to upload a secret file
If your connection requires an external secret file, add it under File attachments. Common examples include:
- SSL certificate or key store files
- OAuth or service account JSON credentials
- Driver-specific credential files referenced by connection properties
Enter the relative file path to materialize the attachment, then upload the file content. The agent stores the file securely and uses it when establishing the connection.
Legacy connections
The section below describes the legacy connection form. For new connections on supported agents, use the connection wizard instead.
JDBC connections allow the agent to access external databases through a JDBC driver. Use this connection type when the agent must connect to relational databases such as PostgreSQL, MySQL, SQL Server, or other JDBC-compatible systems.
When creating or editing a legacy JDBC connection, complete the fields shown in the form below:
- Name: A descriptive label for the connection.
- Type: Set to
JDBC. - URL / Endpoint: The full JDBC connection string, for example
jdbc:postgresql://localhost:5432/postgres. - Driver Class Name: Specify the JDBC driver class to use when one is required by the connector.
- Username: The database login user.
- Password: The database login password.
For optional properties and file attachments, see Connection properties and file attachments .